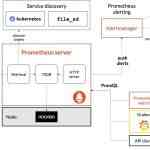
服务发现
kubernetes 提供了 service 的概念可以通过 VIP 访问 pod 提供的服务,但是在使用的时候还有一个问题:怎么知道某个应用的 VIP?比如我们有两个应用,一个 app,一个 是 db,每个应用使用 rc 进行管理,并通过 service 暴露出端口提供服务。app 需要连接到 db 应用,我们只知道 db 应用的名称,但是并不知道它的 VIP 地址。
最简单的办法是从 kubernetes 提供的 API 查询。但这是一个糟糕的做法,首先每个应用都要在启动的时候编写查询依赖服务的逻辑,这本身就是重复和增加应用的复杂度;其次这也导致应用需要依赖 kubernetes,不能够单独部署和运行(当然如果通过增加配置选项也是可以做到的,但这又是增加负责度)。
开始的时候,kubernetes 采用了 docker 使用过的方法——环境变量。每个 pod 启动时候,会把通过环境变量设置所有服务的 IP 和 port 信息,这样 pod 中的应用可以通过读取环境变量来获取依赖服务的地址信息。这种方式服务和环境变量的匹配关系有一定的规范,使用起来也相对简单,但是有个很大的问题:依赖的服务必须在 pod 启动之前就存在,不然是不会出现在环境变量中的。
更理想的方案是:应用能够直接使用服务的名字,不需要关心它实际的 ip 地址,中间的转换能够自动完成。名字和 ip 之间的转换就是 DNS 系统的功能,因此 kubernetes 也提供了 DNS 方法来解决这个问题。
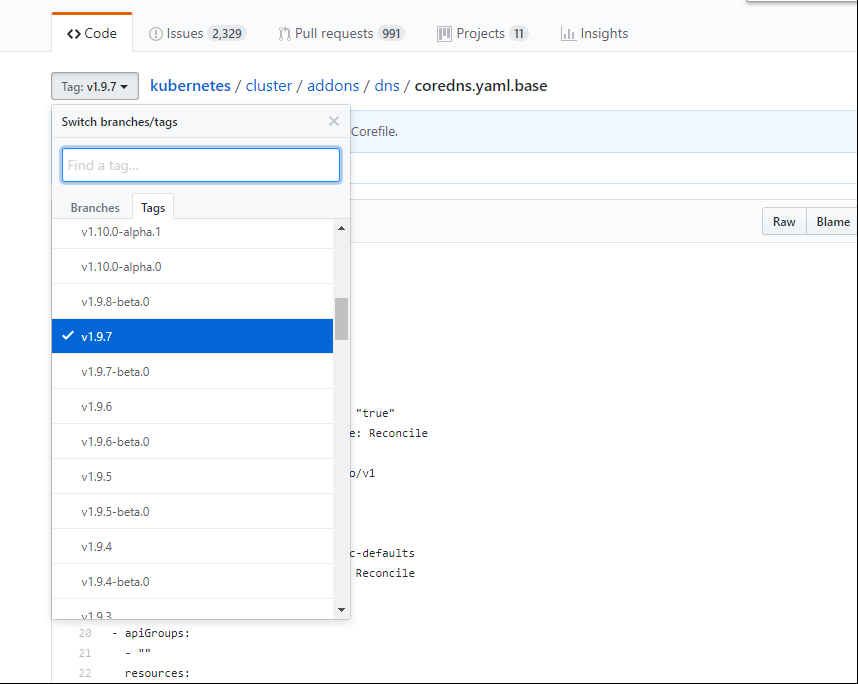
官方文件目录:kubernetes/cluster/addons/dns
预定义的RoleBinding system:kube-dns将kube-system 命名空间的kube-dnsServiceAccount 与 system:kube-dns Role 绑定,该Role 具有访问kube-apiserver DNS 相关的API 权限:
1、创建并修改我们需要使用到的文件:kubedns-controller.yaml.base(拷贝的时候记得选取你所安装的版本)。
[root@NodeA ~]# cat kube-dns.yaml
# Copyright 2016 The Kubernetes Authors.
#
# Licensed under the Apache License, Version 2.0 (the "License");
# you may not use this file except in compliance with the License.
# You may obtain a copy of the License at
#
#     http://www.apache.org/licenses/LICENSE-2.0
#
# Unless required by applicable law or agreed to in writing, software
# distributed under the License is distributed on an "AS IS" BASIS,
# WITHOUT WARRANTIES OR CONDITIONS OF ANY KIND, either express or implied.
# See the License for the specific language governing permissions and
# limitations under the License.

# Should keep target in cluster/addons/dns-horizontal-autoscaler/dns-horizontal-autoscaler.yaml
# in sync with this file.

# __MACHINE_GENERATED_WARNING__

apiVersion: v1
kind: Service
metadata:
  name: kube-dns
  namespace: kube-system
  labels:
    k8s-app: kube-dns
    kubernetes.io/cluster-service: "true"
    addonmanager.kubernetes.io/mode: Reconcile
    kubernetes.io/name: "KubeDNS"
spec:
  selector:
    k8s-app: kube-dns
  clusterIP: __PILLAR__DNS__SERVER__
  ports:
  - name: dns
    port: 53
    protocol: UDP
  - name: dns-tcp
    port: 53
    protocol: TCP
---
apiVersion: v1
kind: ServiceAccount
metadata:
  name: kube-dns
  namespace: kube-system
  labels:
    kubernetes.io/cluster-service: "true"
    addonmanager.kubernetes.io/mode: Reconcile
---
apiVersion: v1
kind: ConfigMap
metadata:
  name: kube-dns
  namespace: kube-system
  labels:
    addonmanager.kubernetes.io/mode: EnsureExists
---
apiVersion: extensions/v1beta1
kind: Deployment
metadata:
  name: kube-dns
  namespace: kube-system
  labels:
    k8s-app: kube-dns
    kubernetes.io/cluster-service: "true"
    addonmanager.kubernetes.io/mode: Reconcile
spec:
  # replicas: not specified here:
  # 1. In order to make Addon Manager do not reconcile this replicas parameter.
  # 2. Default is 1.
  # 3. Will be tuned in real time if DNS horizontal auto-scaling is turned on.
  strategy:
    rollingUpdate:
      maxSurge: 10%
      maxUnavailable: 0
  selector:
    matchLabels:
      k8s-app: kube-dns
  template:
    metadata:
      labels:
        k8s-app: kube-dns
      annotations:
        scheduler.alpha.kubernetes.io/critical-pod: ''
    spec:
      tolerations:
      - key: "CriticalAddonsOnly"
        operator: "Exists"
      volumes:
      - name: kube-dns-config
        configMap:
          name: kube-dns
          optional: true
      containers:
      - name: kubedns
        # Create之前要提前pull一下image
        image: cnych/k8s-dns-kube-dns-amd64:1.14.8
        # image: k8s.gcr.io/k8s-dns-kube-dns-amd64:1.14.10
        resources:
          # TODO: Set memory limits when we've profiled the container for large
          # clusters, then set request = limit to keep this container in
          # guaranteed class. Currently, this container falls into the
          # "burstable" category so the kubelet doesn't backoff from restarting it.
          limits:
            memory: 170Mi
          requests:
            cpu: 100m
            memory: 70Mi
        livenessProbe:
          httpGet:
            path: /healthcheck/kubedns
            port: 10054
            scheme: HTTP
          initialDelaySeconds: 60
          timeoutSeconds: 5
          successThreshold: 1
          failureThreshold: 5
        readinessProbe:
          httpGet:
            path: /readiness
            port: 8081
            scheme: HTTP
          # we poll on pod startup for the Kubernetes master service and
          # only setup the /readiness HTTP server once that's available.
          initialDelaySeconds: 3
          timeoutSeconds: 5
        args:
        # 红色文字是需要修改的内容
        - --domain=cluster.local.
        # - --domain=__PILLAR__DNS__DOMAIN__.
        - --dns-port=10053
        - --config-dir=/kube-dns-config
        - --v=2
        env:
        - name: PROMETHEUS_PORT
          value: "10055"
        ports:
        - containerPort: 10053
          name: dns-local
          protocol: UDP
        - containerPort: 10053
          name: dns-tcp-local
          protocol: TCP
        - containerPort: 10055
          name: metrics
          protocol: TCP
        volumeMounts:
        - name: kube-dns-config
          mountPath: /kube-dns-config
      - name: dnsmasq
        # Create之前要提前pull一下image
        image: cnych/k8s-dns-dnsmasq-nanny-amd64:1.14.8
        # image: k8s.gcr.io/k8s-dns-dnsmasq-nanny-amd64:1.14.10
        livenessProbe:
          httpGet:
            path: /healthcheck/dnsmasq
            port: 10054
            scheme: HTTP
          initialDelaySeconds: 60
          timeoutSeconds: 5
          successThreshold: 1
          failureThreshold: 5
        args:
        - -v=2
        - -logtostderr
        - -configDir=/etc/k8s/dns/dnsmasq-nanny
        - -restartDnsmasq=true
        - --
        - -k
        - --cache-size=1000
        - --no-negcache
        - --log-facility=-
        # 红色文字是需要修改的内容
        - --server=/cluster.local/127.0.0.1#10053
        - --server=/__PILLAR__DNS__DOMAIN__/127.0.0.1#10053
        - --server=/in-addr.arpa/127.0.0.1#10053
        - --server=/ip6.arpa/127.0.0.1#10053
        ports:
        - containerPort: 53
          name: dns
          protocol: UDP
        - containerPort: 53
          name: dns-tcp
          protocol: TCP
        # see: https://github.com/kubernetes/kubernetes/issues/29055 for details
        resources:
          requests:
            cpu: 150m
            memory: 20Mi
        volumeMounts:
        - name: kube-dns-config
          mountPath: /etc/k8s/dns/dnsmasq-nanny
      - name: sidecar
        # Create之前要提前pull一下image
        image: cnych/k8s-dns-sidecar-amd64:1.14.8
        # image: k8s.gcr.io/k8s-dns-sidecar-amd64:1.14.10
        livenessProbe:
          httpGet:
            path: /metrics
            port: 10054
            scheme: HTTP
          initialDelaySeconds: 60
          timeoutSeconds: 5
          successThreshold: 1
          failureThreshold: 5
        args:
        - --v=2
        - --logtostderr
        # 红色文字是需要修改的内容
        - --probe=kubedns,127.0.0.1:10053,kubernetes.default.svc.cluster.local.,5,SRV
        # - --probe=kubedns,127.0.0.1:10053,kubernetes.default.svc.__PILLAR__DNS__DOMAIN__,5,SRV
        - --probe=dnsmasq,127.0.0.1:53,kubernetes.default.svc.cluster.local.,5,SRV
        # - --probe=dnsmasq,127.0.0.1:53,kubernetes.default.svc.__PILLAR__DNS__DOMAIN__,5,SRV
        ports:
        - containerPort: 10054
          name: metrics
          protocol: TCP
        resources:
          requests:
            memory: 20Mi
            cpu: 10m
      dnsPolicy: Default  # Don't use cluster DNS.
      serviceAccountName: kube-dns
注释:kubedns-controller.yaml 中定义的 Pods 时使用了 kubedns-sa.yaml 文件定义的 kube-dns ServiceAccount,所以具有访问 kube-apiserver DNS 相关 API 的权限;–domain 为集群环境变量CLUSTER_DNS_DOMAIN 的值;使用系统已经做了 RoleBinding 的 kube-dns ServiceAccount,该账户具有访问 kube-apiserver DNS 相关 API 的权限。
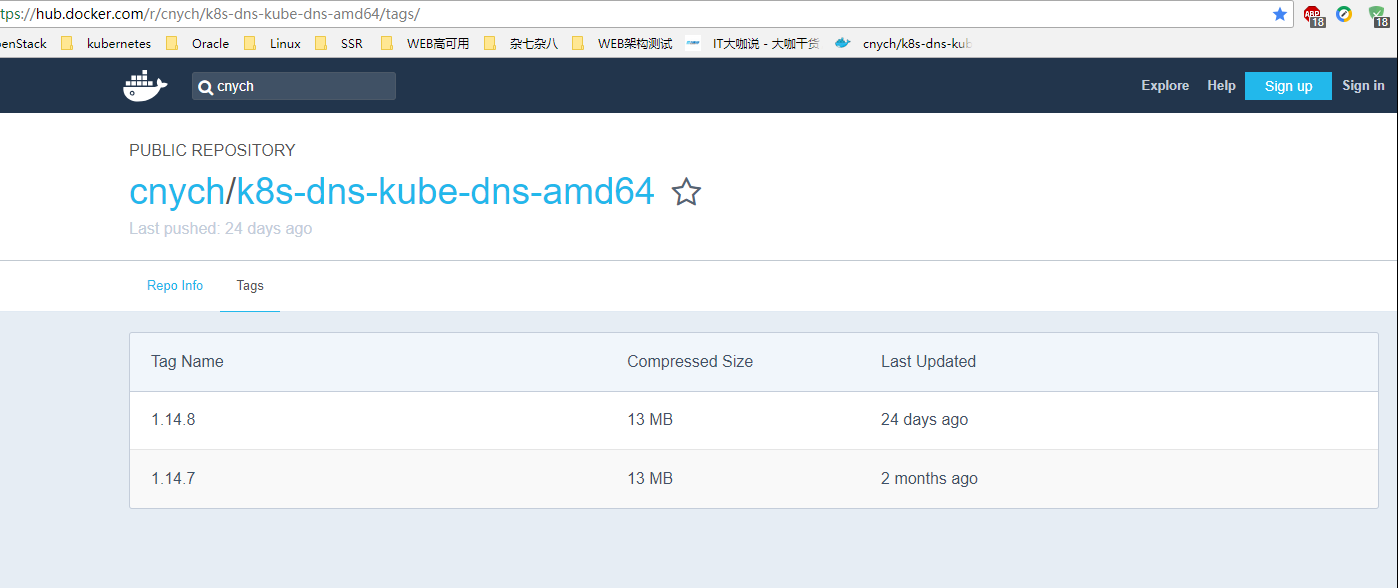
2、镜像拉取
在Create yaml文件之前我们需要拉取相关的image、拉取地址:https://hub.docker.com/(直接拉取会因为网络问题导致拉取失败、我们需要到Docker hub上面去拉取别人共享的镜像、拉取之前一定要保证网络可达)。
# 所需镜像如下:
cnych/k8s-dns-sidecar-amd64:1.14.8
cnych/k8s-dns-kube-dns-amd64:1.14.8
cnych/k8s-dns-dnsmasq-nanny-amd64:1.14.8
执行docker pull cnych/k8s-dns-kube-dns-amd64:1.14.8即可拉取镜像。
镜像拉取完成之后执行kubectl c reate -f kube-dns.yaml生成Pod
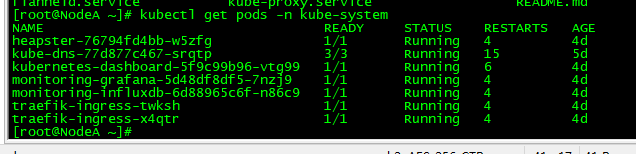
2、检查kube-dns功能
新建一个Deployment:
$ cat > my-nginx.yaml<<EOF
apiVersion: extensions/v1beta1
kind: Deployment
metadata:
  name: my-nginx
spec:
  replicas: 2
  template:
    metadata:
      labels:
        run: my-nginx
    spec:
      containers:
      - name: my-nginx
        image: nginx:1.7.9
        ports:
        - containerPort: 80
EOF
$ kubectl create -f my-nginx.yaml
deployment "my-nginx" created
Expose 该Deployment,生成my-nginx 服务:
kubectl expose deploy my-nginxkubectlexposedeploymy−nginx kubectl get services
NAME     TYPE    CLUSTER-IP   EXTERNAL-IP  PORT(S)  AGE
kubernetes  ClusterIP  10.254.0.1   <none>    443/TCP  1d
my-nginx   ClusterIP  10.254.32.162  <none>    80/TCP  56s
然后创建另外一个Pod,查看/etc/resolv.conf是否包含kubelet配置的–cluster-dns 和–cluster-domain,是否能够将服务my-nginx 解析到上面显示的CLUSTER-IP 10.254.32.162上:
$ cat > pod-nginx.yaml<<EOF
apiVersion: v1
kind: Pod
metadata:
  name: nginx
spec:
  containers:
  - name: nginx
    image: nginx:1.7.9
    ports:
    - containerPort: 80
EOF
$ kubectl create -f pod-nginx.yaml
pod "nginx" created
# 通过此命令我们可以进入到容器的内部系统里面去查看相关内容
$ kubectl exec  nginx -i -t -- /bin/bash
root@nginx:/# cat /etc/resolv.conf
nameserver 10.254.0.2
search default.svc.cluster.local. svc.cluster.local. cluster.local.
options ndots:5

root@nginx:pensive:# ping my-nginx
PING my-nginx.default.svc.cluster.local (10.254.32.162): 48 data bytes
^C— my-nginx.default.svc.cluster.local ping statistics —
14 packets transmitted, 0 packets received, 100% packet loss

root@nginx:pensive:# ping kubernetes
PING kubernetes.default.svc.cluster.local (10.254.0.1): 48 data bytes
^C— kubernetes.default.svc.cluster.local ping statistics —
6 packets transmitted, 0 packets received, 100% packet loss

root@nginx:pensive:# ping kube-dns.kube-system.svc.cluster.local
PING kube-dns.kube-system.svc.cluster.local (10.254.0.2): 48 data bytes
^C— kube-dns.kube-system.svc.cluster.local ping statistics —
2 packets transmitted, 0 packets received, 100% packet loss