1、什么是Docker
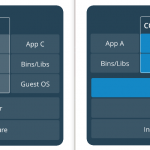
Docker是一个开源的引擎,可以轻松的为任何应用创建一个轻量级的、可移植的、自给自足的容器。开发者在笔记本上编译测试通过的容器可以批量地在生产环境中部署,包括VMs(虚拟机)、bare metal、OpenStack 集群和其他的基础应用平台。Docker通常用于如下场景:
- web应用的自动化打包和发布;
- 自动化测试和持续集成、发布;
- 在服务型环境中部署和调整数据库或其他的后台应用;
- 从头编译或者扩展现有的OpenShift或Cloud Foundry平台来搭建自己的PaaS环境。
Docker官方下载地址:https://docs.docker.com/install/linux/docker-ce/centos/
2、安装配置Docker CE最新版
# 设置Docker安装源:
sudo yum-config-manager \
–add-repo \
https://download.docker.com/linux/centos/docker-ce.repo

# 安装Docker CE
sudo yum install docker-ce

# 安装完成之后启动并设置Docker为启动项
sudo systemctl start docker
sudo systemctl enable docker
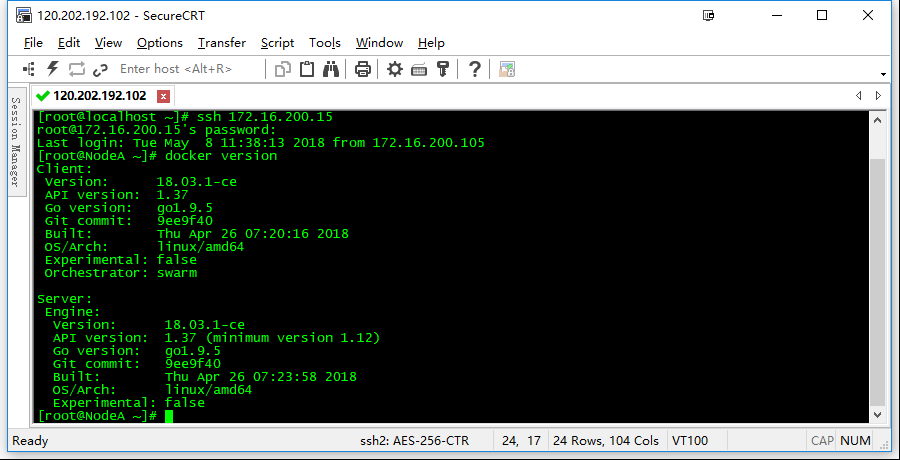
验证Docker是否安装并启动成功

3、配置Docker
修改docker 的systemd unit 文件:
[Service]
Type=notify
# the default is not to use systemd for cgroups because the delegate issues still
# exists and systemd currently does not support the cgroup feature set required
# for containers run by docker
EnvironmentFile=-/run/flannel/docker

ExecStart=/usr/bin/dockerd –log-level=infoDOCKER_NETWORK_OPTIONS
ExecReload=/bin/kill -s HUP $MAINPID
# Having non-zero Limit*s causes performance problems due to accounting overhead
# in the kernel. We recommend using cgroups to do container-local accounting.
LimitNOFILE=infinity
LimitNPROC=infinity
LimitCORE=infinity
# Uncomment TasksMax if your systemd version supports it.
# Only systemd 226 and above support this version.
#TasksMax=infinity
TimeoutStartSec=0
# set delegate yes so that systemd does not reset the cgroups of docker containers
Delegate=yes
# kill only the docker process, not all processes in the cgroup
KillMode=process
# restart the docker process if it exits prematurely
Restart=on-failure
StartLimitBurst=3
StartLimitInterval=60s

[Install]
WantedBy=multi-user.target
dockerd 运行时会调用其它 docker 命令,如 docker-proxy,所以需要将 docker 命令所在的目录加到 PATH 环境变量中。flanneld 启动时将网络配置写入到 /run/flannel/docker 文件中的变量 DOCKER_NETWORK_OPTIONS,dockerd 命令行上指定该变量值来设置 docker0 网桥参数。如果指定了多个 EnvironmentFile 选项,则必须将 /run/flannel/docker 放在最后(确保 docker0 使用 flanneld 生成的 bip 参数)。不能关闭默认开启的 –iptables 和 –ip-masq 选项。如果内核版本比较新,建议使用 overlay 存储驱动。
docker 从 1.13 版本开始,可能将 iptables FORWARD chain的默认策略设置为DROP,从而导致 ping 其它 Node 上的 Pod IP 失败,遇到这种情况时,需要手动设置策略为 ACCEPT:
sudo iptables -P FORWARD ACCEPT
如果没有开启上面的路由转发(net.ipv4.ip_forward=1),则需要把以下命令写入/etc/rc.local文件中,防止节点重启iptables FORWARD chain的默认策略又还原为DROP(下面的开机脚本我测试了几次都没生效,不知道是不是方法有误,所以最好的方式还是开启上面的路由转发功能,一劳永逸)
sleep 60 && /sbin/iptables -P FORWARD ACCEPT
为了加快 pull image 的速度,可以使用国内的仓库镜像服务器,同时增加下载的并发数。(如果 dockerd 已经运行,则需要重启 dockerd 生效。)
$ cat /etc/docker/daemon.json
{
"max-concurrent-downloads": 10
}
4、启动Docker
sudo systemctl daemon-reload*sudosystemctldaemon*−*reload* sudo systemctl stop firewalld
sudo systemctl disable firewalld*sudosystemctldisablefirewalld* sudo iptables -F && sudo iptables -X && sudo iptables -F -t nat && sudo iptables -X -t nat
sudo systemctl enable docker*sudosystemctlenabledocker* sudo systemctl start docker
需要关闭 firewalld(centos7)/ufw(ubuntu16.04),否则可能会重复创建 iptables 规则。最好清理旧的 iptables rules 和 chains 规则、执行命令:docker version,检查docker服务是否正常。
注:如果没有生效我们可以执行下面的命令。
vim /etc/sysctl.conf
net.ipv4.ip_forward=1 net.bridge.bridge-nf-call-iptables=1 net.bridge.bridge-nf-call-ip6tables=1
sysctl -p